How to Take a wrist shot in hockey
The basic wrist shot
Improving Wrist Shot power
Improving Wrist Shot Release
For more tips on shooting I recommend the building blocks of shooting video series which I include on the shooting resource page.
This article focuses on how to take a wrist shot. I believe it is important to master technique and accuracy before working on power. I will be adding an article on how to improve wrist shot power soon. I have bought a radar gun and will test every possible way to increase wrist shot power through technique and I will also be adding workouts and training, I will post the article after extensive testing and research. For now though lets focus on the basics
Wrist Shot Tips
This article will outline how to take a wrist shot in hockey, or if you already know how to take a wrist shot, it may provide you with some tips on how to improve your wrist shot.
- Puck Location
- When taking a wrist shot the puck should be drawn back behind or even with your back leg (wherever you feel most comfortable), think of it as throwing a ball, in order to get more power, you want to pull it back so you can get a lot of power. You can raise a puck off of the ice without pulling the puck back, however pulling the puck back gives your wrist shot a lot more power.
- Location of Puck on the Blade of the Stick
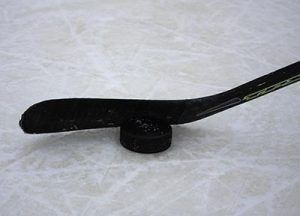
- In order to take a wrist shot the puck should be between the heel and middle of the blade. While you are executing the wrist shot the puck will roll forwards toward the toe of your stick. This will give the puck a spin, and also allow you to aim where you want to shoot.
- Location of your Hands
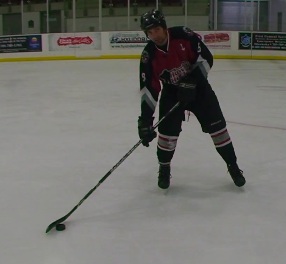
- When shooting your top hand should be holding the top of the stick, and your lower hand should be no more than half way down your stick, many players hand position differs and your hand position will vary depending on different types of wrist shots (close to the net, cutting in, angle, etc..). Some guides say to have your hands about twelve to fifteen inches apart, but this depends on how old (and tall) you are. A good guide is to touch your elbow of the bottom hand to your top hand and then grab the stick. You don’t want your hand any higher than that.
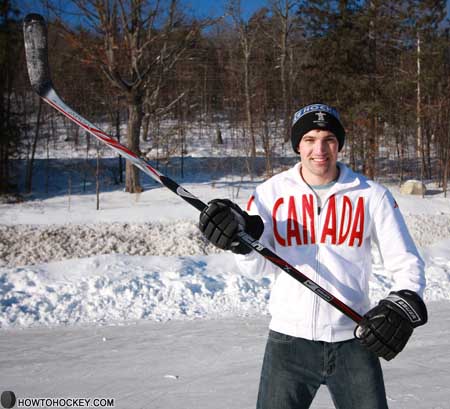
In this picture my bottom hand is close to the middle of the shaft. Anywhere between the middle and 3/4 of the way down is fine, and the position changes depending on where you are shooting from and the angle you are shooting from. How to take a Wrist Shot Video
In this video I take you through the steps of the first type of wrist shot you should learn. When taking a wrist shot you can transfer your weight onto the foot closest to the blade of your stick, or the one furthest from the blade of your stick. You get the most power if you transfer the weight to the foot furthest from the blade, so that is the technique I show below. (other method shown below the video)
Now that you have watched the How to take a wristshot video check out shooting from the “off foot” below, the points about weight transfer and stick flex are the same for both methods of the shotWrist Shot From the Off Foot
There are two types of wrist shots, the method below shows you how to shoot from the off foot, you should practice both methods. You can see my article and video for more info on the two types of wrist shots.
- Weight Transfer
- When you begin to take the shot most of your weight or power should be on your front leg, while taking the wrist shot you should move even more weight to your front leg, and push off with your back and front leg, thus putting more power and energy into your wrist shot.
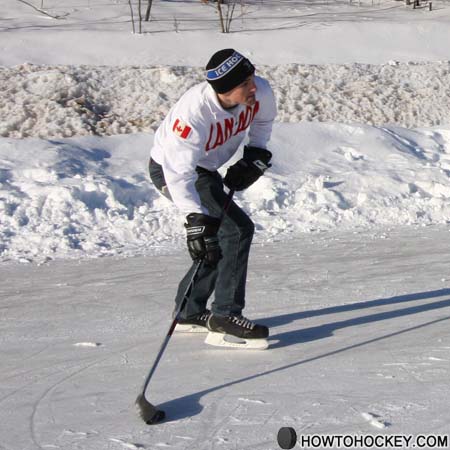
This picture is taken just before I start to shoot. You can see I am leaning over and forward a bit. I am just about to push off with my back leg. Using your legs is a great way to add more power and energy into your shot. - Stick Flex
- Some people do not know that the stick actually adds a lot of speed and power to your shot. When you are shooting if you lean into the shot you will load the stick, putting energy into the shaft, which is then transferred to the puck when you release your shot.
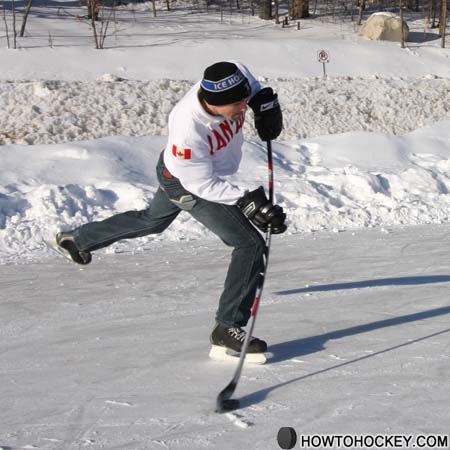
You can see the amount of flex that is on my stick, mid shot. This flex adds a lot of power to your shot. When that flex (potential energy) is released, it will launch the puck at the net. You can generate a lot of flex on your stick by buying a stick with appropriate flex (depends on your weight and size), leaning into your shot, and building the muscles involved in taking a wrist shot. Right now I am pushing hard with my bottom hand, while pulling back with my top hand, the puck generates resistance on the bottom of the stick which results in the shaft flexing. - Follow Through
- Your follow through is very important, when you follow through you are essentialy aiming where the puck is going. A good follow through also ensures that you are getting full power from your wrist shot. By continuing to push through with your shot you will keep the puck on the blade of your stick longer, thus transfering more energy onto the puck, and building more speed on your shot. Practice a good hard shot, along with a powerful follow through. When you are following through you should roll your wrists over, and point at where you want the puck to go. After shooting it should look like you are looking down the scope of a rifle
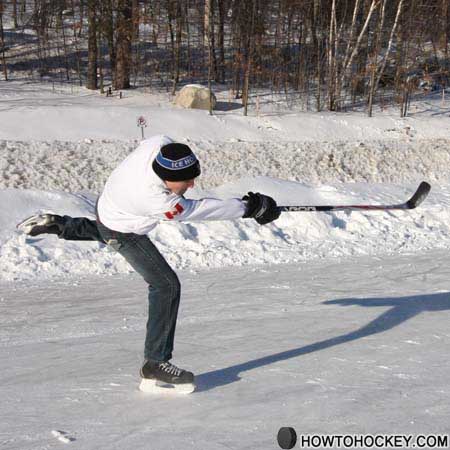
You can see I have completed the wrist shot and this is the follow through. I shot high, and I am looking down the shaft of the stick at where I was aiming. My leg is up in the air because I put all of my weight onto my front leg. I pushed off with my back and front legs to drive more energy into my shot. - How to execute the Wrist Shot
- To take the wrist shot have the puck drawn back, your hands in the proper position, and the puck near the heel of the blade of the stick. When you are properly set up begin to take the wrist shot, pull the puck towards the net with the blade of the stick. When the puck has moved a bit on the ice, you want to pull with your top hand, while pushing with your bottom hand, this generates flex on the stick and lifts the puck off of the ice. While the puck is off the ice and on the blade of your stick you will want to roll, or flick your wrist in order to get full power from the shot, and also get more accuracy from your wrist shot. You should point the toe of the blade of the stick at where you are shooting, and follow through. Learning to take a wrist shot can feel very awkward as it is an unnatural movement for the human body. When explained in words it sounds very complicated, however once you learn how to do it, you will never forget! A good way to learn the basics is to start with a light puck, once you have the basic motion and muscle memory of how to take a wrist shot, then try with a normal puck.

In this wrist shot I had my bottom hand a bit higher on the shaft of the stick. You can see I had the puck near the heel of my skate to start, pushed off with my back leg to transfer my weight into the shot, shot the puck and followed through. Wrist Shot
I hope you enjoyed this article, how to take a wrist shot. I will be adding more articles, pictures and videos regularly. You can subscribe to my posts using the box to your left, or an RSS reader if you would like helpful hockey tips on a regular basis. I have also included a video to show you exactly what to do.
Wrist Shot Video for Beginners
In this video I show you every step involved in taking a wrist shot.
How to Take a Wrist Shot From Your off-foot
In the video below I show you how to take a wrist shot from your off foot.
